How to use WireLang™ Live
From installation to live translation in about two minutes. No technical skills needed.
Download and Install
Download the installer for your operating system (Windows or macOS) from the homepage. Double-click the downloaded file and follow the quick installer prompt. Once complete, WireLang™ Live will launch automatically.
Sign in with Google
Launch the app and click Sign in with Google. This opens a secure tab in your default browser to authorize your account. Once authorized, you can request free demo credits or add your own API key to try it immediately.
Choose a payment option
Select your billing method (you can switch anytime):
- Credits: Use WireLang's built-in translation service. Top up from the app when you need more time. New accounts receive 10 free minutes of trial credits.
- BYO key: Connect your Google AI Studio key to translate using your own Google quota. How to get an API key →
Play any audio on your computer
Because WireLang™ Live runs natively, it captures all system output audio. Play a YouTube video in your browser, watch a video in VLC, join a Zoom or Teams call, or listen to a podcast in Spotify. Any audio playing through your speakers can be translated.
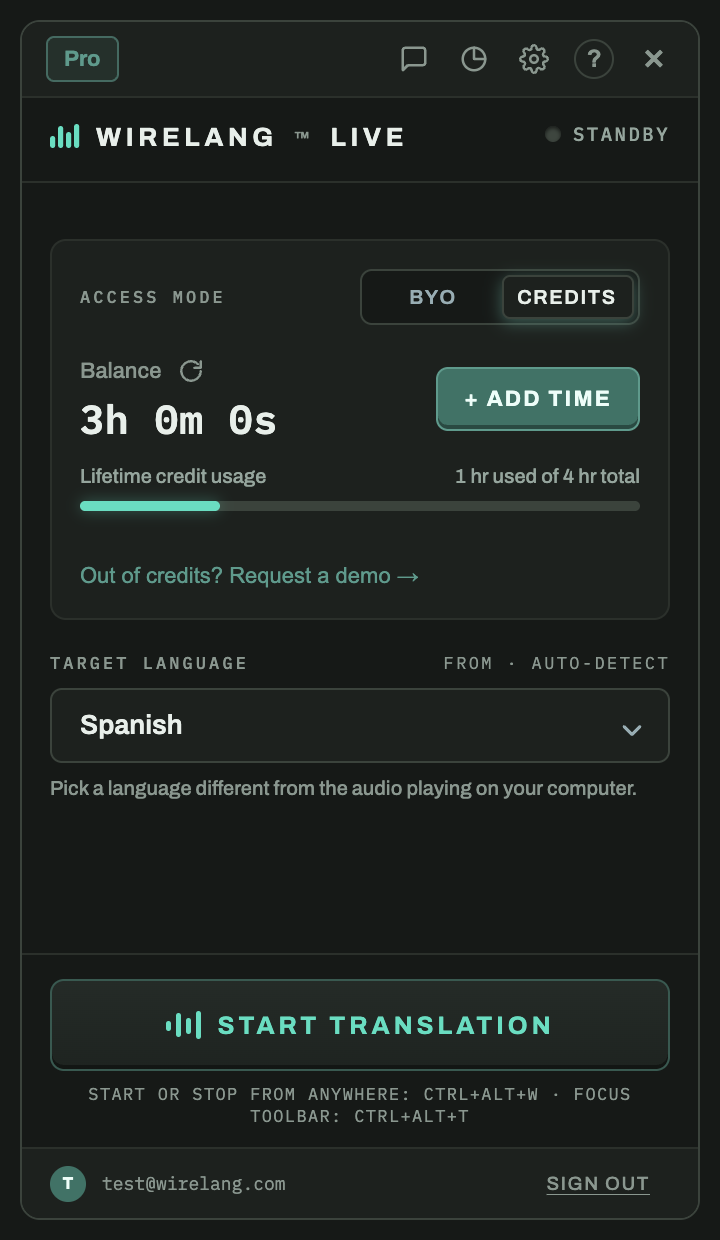
Pick your language and press Start
In the app, choose the target language you want to hear and click Start Translating. Within one to two seconds, the translated voice plays over the softened original audio.
Note: Set your target language to the language you want to hear (for example, choose Spanish when playing an English video).
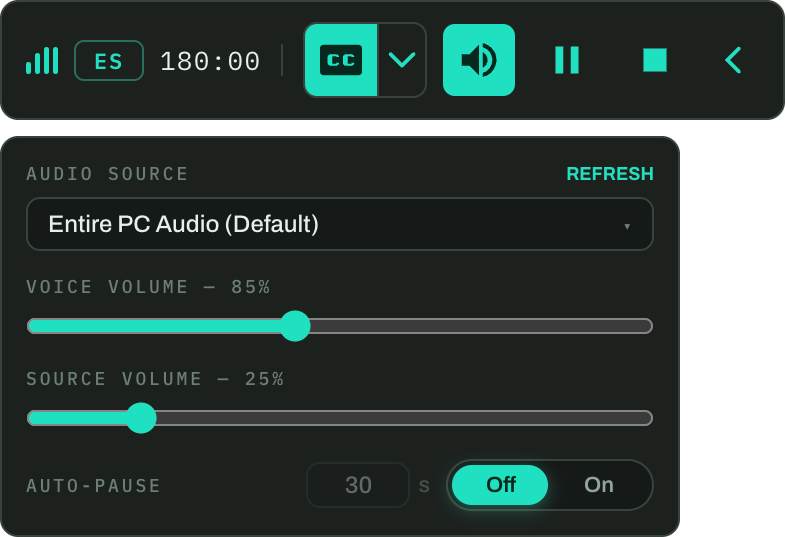
Using the floating toolbar
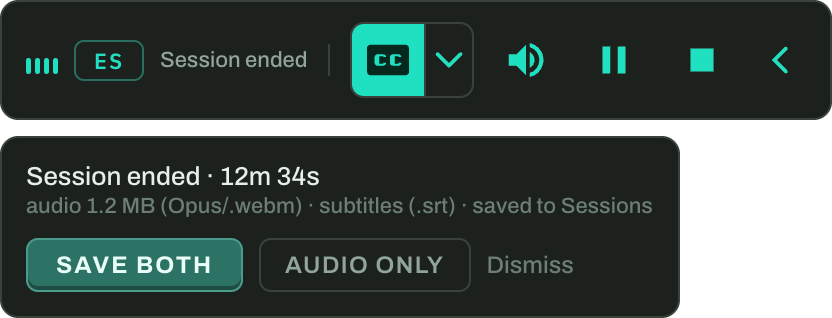
When translation starts, the main window minimizes and a compact toolbar floats on screen. From left to right: the waveform (teal for live, amber while connecting), the language chip, the timer (elapsed time on BYO, remaining balance on Credits), CC for subtitles, the speaker for volume controls, and pause / stop buttons. You can drag the toolbar anywhere or click the chevron to collapse it.

Balance the volumes
Click the speaker icon to open the audio menu. Voice volume sets how loud the translated voice plays (up to 200%). Source volume ducks the original audio underneath it. On Windows you can also pick a single app as the audio source instead of the entire PC.
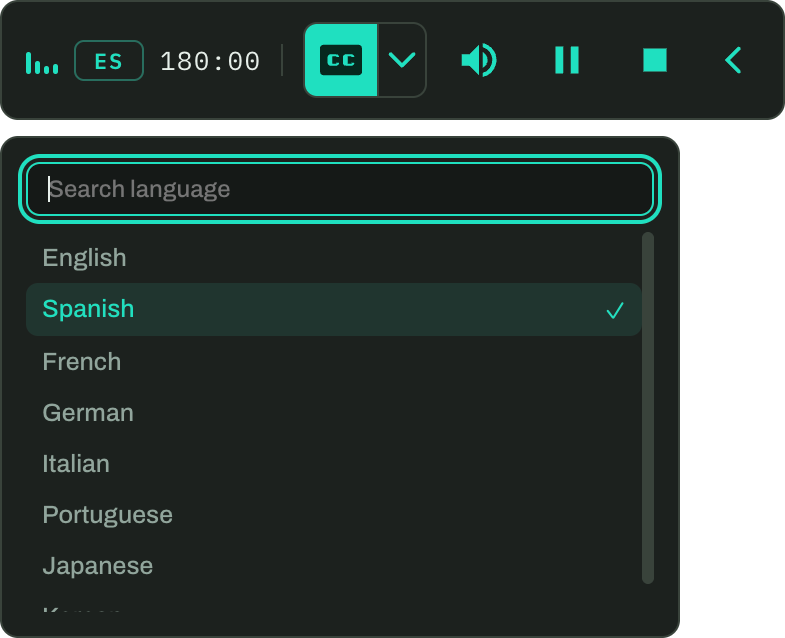
Switch languages mid-session
Click the language chip (such as "ES") and pick a new target from 60+ languages without stopping. The toolbar shows a brief "switching..." indicator for a moment and translation resumes in the new language.
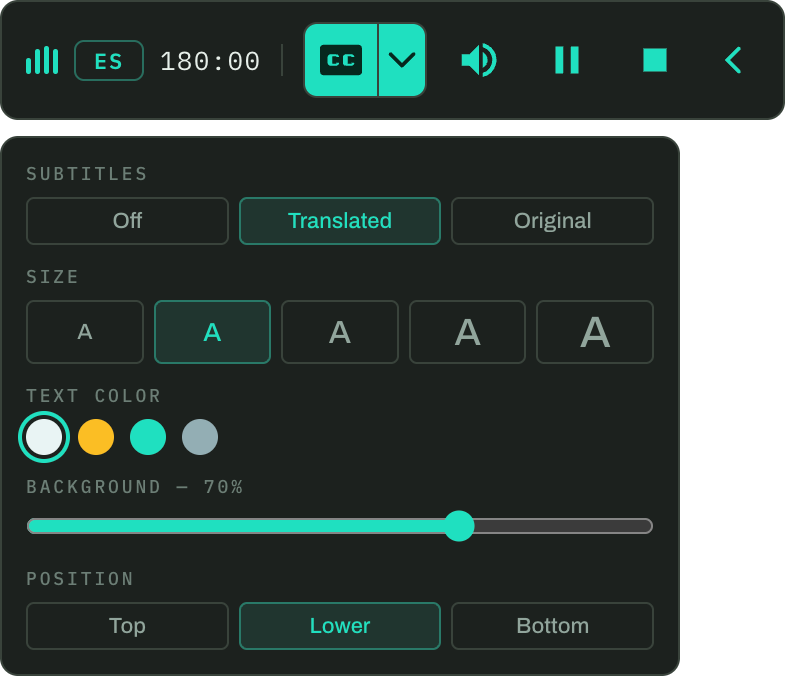
Turn on live subtitles
Click CC to display subtitles as you listen. Open the style panel (the dropdown arrow next to CC) to choose Off, Translated, or Original, text size, color, background opacity, and position (top, lower third, or bottom). Your preferences are saved across sessions.
Save translated audio
When a recording is available at the end of a session, a dialog offers the audio as an open Opus file with matching .srt subtitles (approximately 10 MB per hour). With session history enabled, the session is also preserved in your local session history, so dismissing the prompt does not delete the record.
Revisit your sessions
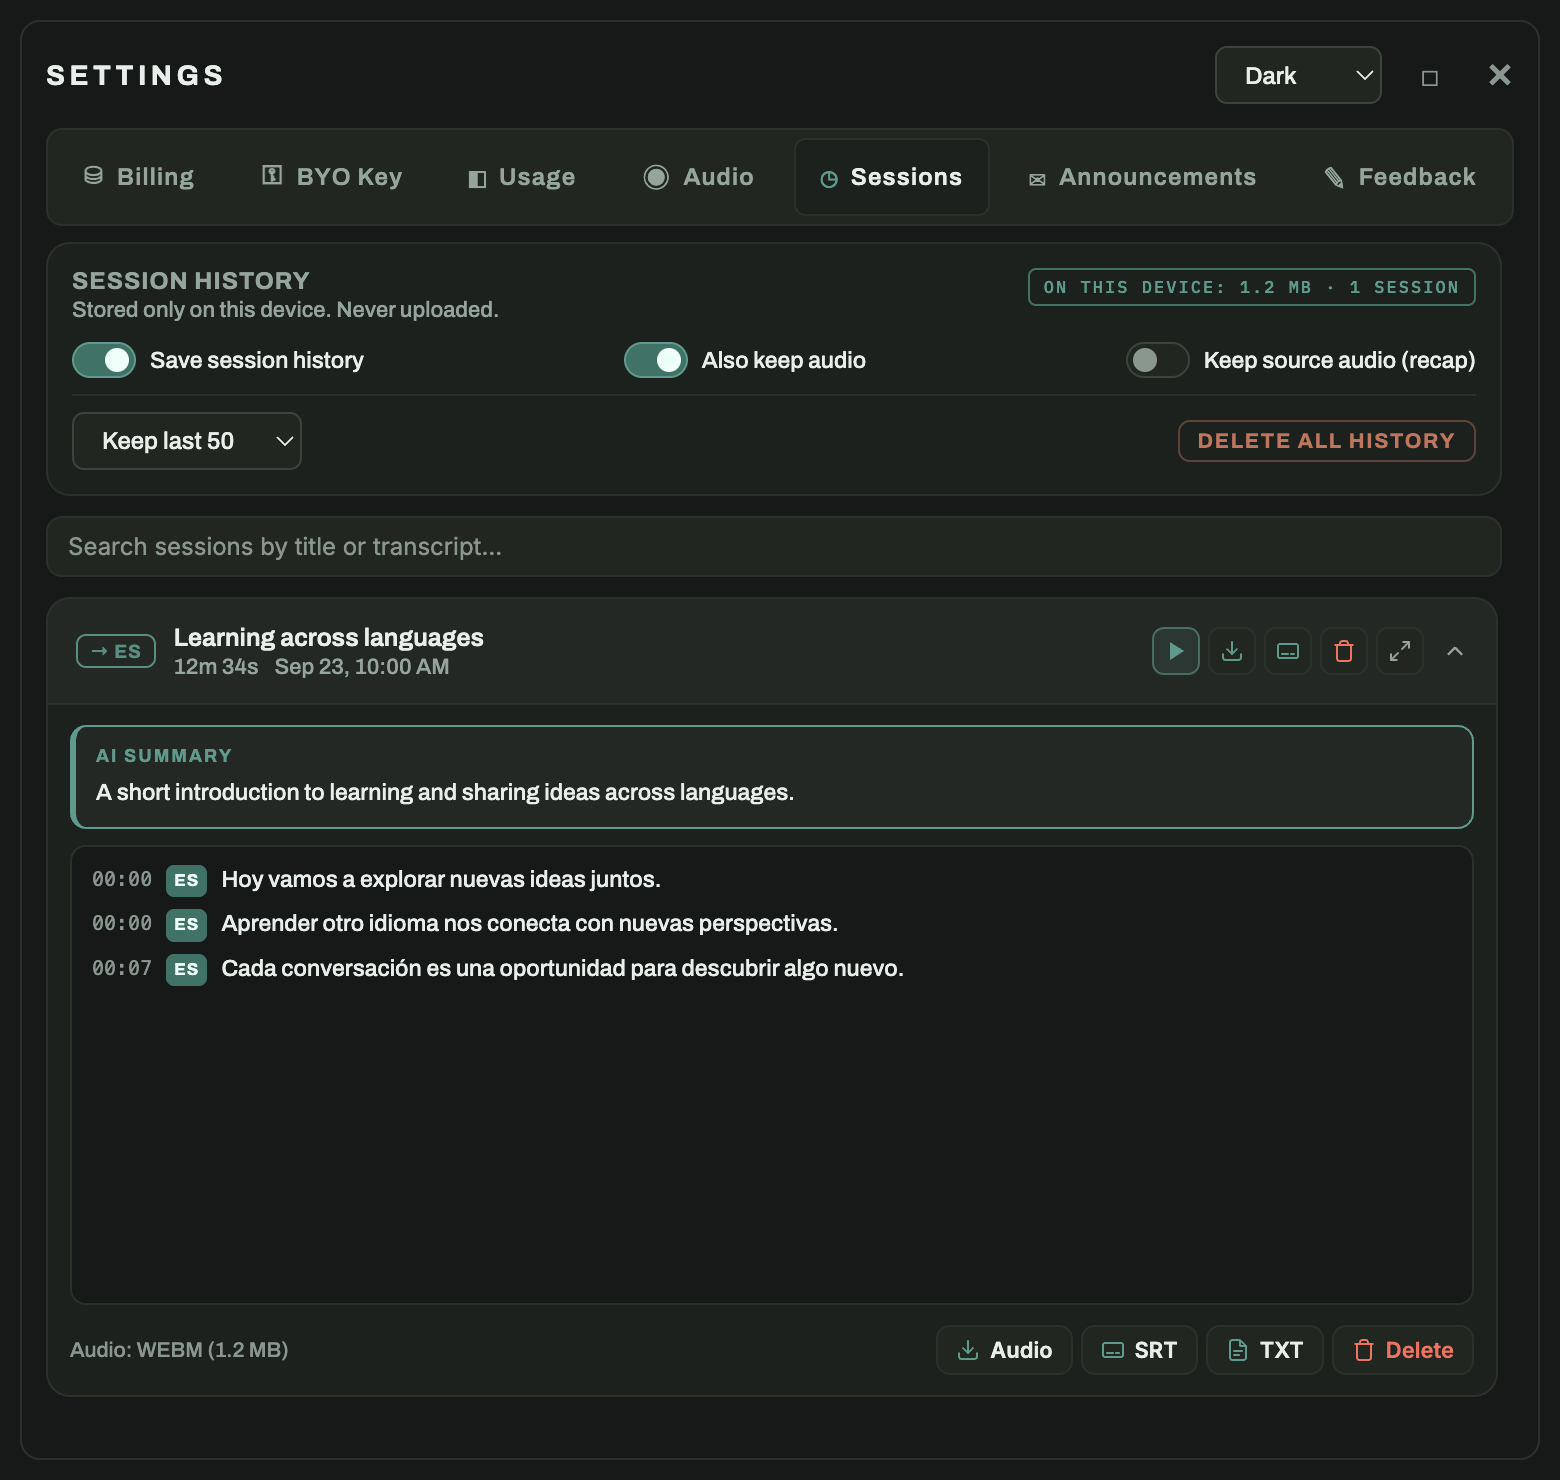
Click View saved sessions in the main window (or open Settings → Sessions) to browse past sessions stored on your device. Search by title or transcript text, click any card to read the full timestamped transcript, and click Generate summary for a recap of key points.
Each session card provides quick actions: download audio, export .srt subtitles or .txt transcripts, delete a session, or open it in a dedicated window. The header displays local storage usage and allows you to configure history retention limits.
Privacy: WireLang™ Live captures output audio locally using native system APIs (WASAPI loopback on Windows and ScreenCaptureKit on macOS). Audio is processed live for translation and is never stored on our servers. Session history (transcripts and optional audio) stays on your local device, and can be disabled or deleted at any time in Settings → Sessions.
Need help? Email support@wirelang.com for technical support.